
When I start with Magento 2 development, the first question I ask is how I can make a simple module at the bare minimum, sort of just like a entry point to the Magento 2 system. So I can then add my own code and inject my own logic to different part of the core system. So here is how I start building a hello world module.
Create a miniature module
According to the Magento Documentation, creating a new module is pretty straight forward. Only 3 steps,
- Create the module directory
- Create the etc/module.xml file
- Create the registration.php file
So I will go through the above steps
Create the module directory
A new module can live in these two possible locations in a Magento 2 setup.
- the app/code directory
This is the directory we normally store our local modules or project specific modules. The same concept from Magento 1 I think it is the local code pool. I will place this little module here.
- the vendor directory
This is where modules pulled down by Composer. This means the module is published to a composer repository which can be public or private. Modules like Magento core modules and some third party modules are distributed via composer.
It is recommended to have a composer.json file in the module with some basic information about the module. Also this file is needed if this module is to be shared via composer.
OK. Create the directory for my little hello world module. The folder set up follows the naming convention, Vendor Namespace/Module Name with first letter in upper case. I name my module ‘Myan_Helloworld‘ so my folder structure is app/code/Myan/Helloworld.
Create the etc/module.xml file
Go into my little module app/code/Myan/Helloworld. Create a sub directory etc, just like Magento 1, module configuration files are all stored in this etc directory. This module.xml file looks like this.
<?xml version="1.0"?>
<config xmlns:xsi="http://www.w3.org/2001/XMLSchema-instance"
        xsi:noNamespaceSchemaLocation="urn:magento:framework:Module/etc/module.xsd">
    <module name="Myan_Helloworld" setup_version="1.0.0"/>
</config>
Create the registration.php file
This is the mandatory file which allows Magento to load this module properly with its namespace and class loading. Create this file under the module directory root, app/code/Myan/Helloworld
<?php
\Magento\Framework\Component\ComponentRegistrar::register(
    \Magento\Framework\Component\ComponentRegistrar::MODULE,
    'Myan_Helloworld',
    __DIR__
);
Create the composer.json file (Optional)
This file contains the information about this module which can be read by Composer and load additional dependencies if required. For local module, this file is not required, but for module to be distributed via Composer. This file has to be included. So for the sake of completeness. I create this file with this content. You can find more about the composer.json file here.
{
    "name": "myan/helloworld",
    "description": "This is a miniature hello world module to demo the minimum required files and folders for a Magento 2 module.",
    "require": {
        "php": "~5.5.0|~5.6.0|~7.0.0|~7.1.0",
        "magento/magento-composer-installer": "*"
    },
    "license": "MIT",
    "version": "1.0.0",
    "authors": [
        {
            "name": "Ming Yan",
            "email": "mingyan214@gmail.com"
        }
    ],
    "autoload": {
        "files": [
            "registration.php"
        ],
        "psr-4": {
            "Myan\\Helloworld\\": ""
        }
    }
}
Although this file is not required but I think it makes sense to include some extra information about the module for every module we create in the system.
So there we go. Technically the module has been created. Now I need to installed it.
Install the new module
We can first check the module has been detected by Magento module system by running the Magento command, module:status I can see my little module is there in disabled status which is the default status (much better than Magento 1!)

Next step is to enable the module which kicks off the module installation process. Run the Magento command
bin/magento module:enable Myan_Helloworld

As the terminal suggested, we need to run setup:upgrade to install the module. This is a big heavy lifting process depending on the module, if the module has many database operations and updates to be done. It might take some time. But for my hello world module. It should be instant. Once that process is done. My module is live with other Magento modules.
Check that the module is active
My little module is pretty useless. It does NOTHING at all. But it is good starting point for anything big. To make sure the little module works, I will need to find the status in the module list. So run
bin/magento module:status
I see this output,

Behind this output is the app/etc/config.php file which stores the module list with their active flag set for 1 or 0. So I can check there as well.
grep Myan_Helloworld app/etc/config.php

Since I have not added any static files like css or images, there is no need to deploy the static files for this module. In a real case scenario, I have images and js files included in my module. I will need to deploy(copy) these files to the pub/static directory for each locales eg, en_AU, en_US and etc with this command setup:static-content:deploy
Wait! Where is the Hello World???
OK. For the sake of the completeness, lets render the classic Hello World! I create a controller action which render the response in JSON (couldn’t be bothered with the tedious layout:(, lazy)
Create the routing definition, routes.xml
<?xml version="1.0" ?>
<config xmlns:xsi="http://www.w3.org/2001/XMLSchema-instance" xsi:noNamespaceSchemaLocation="urn:magento:framework:App/etc/routes.xsd">
    <!--Use router 'standard' for frontend route-->
    <router id="standard">
        <!--Define a custom route with id and frontName-->
        <route frontName="myan-helloworld" id="myan-helloworld">
            <!--The module which this route match to-->
            <module name="Myan_Helloworld"/>
        </route>
    </router>
</config>
This file sits next to the module.xml. As its name implies, it defines the routing for our module and tells Magento to pass the request to this module when it sees the url has myan-helloworld as the module name defined by standard router matching rule. I have the same name for frontname and id. Although it is not necessary to have the same name as router check against the frontname which is what the user types, layout uses the route-id_controller_action.xml pattern for layout definition. Also for admin controllers, having different id and frontname causes the secret key validation to fail because it confuses the key validation. So I think it is easier to use same frontname and route id.
Create a simple controller action to serve the request.
To serve the request and return the response, I create this little controller action. Unlike Magento 1, controllers in Magento 2 is not a actual file but a folder which groups its actions. Actions are separate PHP classes which extend Magento core controller actions. There are a few different types of core actions. In my case, my action class extends \Magento\Framework\App\Action\Action which is the most commonly used for frontend controller actions. Create this file under app/code/Myan/Helloworld/Controller/Index/Index.php That is the Index Controller Index Action. This is same as M1 where the default action is the index action.
<?php
namespace Myan\Helloworld\Controller\Index;
use \Magento\Framework\App\Action\Action;
use Magento\Framework\App\ResponseInterface;

class Index extends Action
{
  protected $resultJsonFactory;
  public function __construct(
    \Magento\Framework\App\Action\Context $context,
    \Magento\Framework\Controller\Result\JsonFactory $resultJsonFactory
  ) {
    $this->resultJsonFactory = $resultJsonFactory;
    parent::__construct($context);
  }

  /**
   * Execute action based on request and return result
   *
   * Note: Request will be added as operation argument in future
   *
   * @return \Magento\Framework\Controller\ResultInterface|ResponseInterface
   * @throws \Magento\Framework\Exception\NotFoundException
   */
  public function execute()
  {
    return $this->resultJsonFactory
      ->create()
      ->setData(['Hello' => 'World']);
  }
}
Here I use inject a JsonFactory into the action class for rendering Json response so that it bypasses the normal html page rendering with layout and blocks. This is just a quick rendering of the Hello World message in Json.
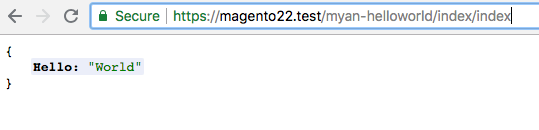
Now to get the update applied, I need to flush Magento cache by running the command ‘bin/magento cache:flush‘. Visit the URL https://magento22.test/myan-helloworld/index/index and it should return the simple Json object {“hello”: “world”}.
There we go. Now I have my little Hello World module.
Thoughts
Some people argue that it is better to use composer to distribute any modules for Magento 2 so to keep app/code folder empty. I see the points but I think in reality it is a bit too extreme. For project specific modules, it is a bit overkill to use composer which adds in extra complexity.
This Json response is good for Ajax requests. To have a proper API server built, we need to use the Service Contract and define the API interfaces there so that we can have a proper authentication and access control done by Magento automatically and securely.
Route id and frontname are a bit confusing sometimes especially to do with layout file naming convention and admin key validation. So I think it is just easy to keep them the same.
BTW, you can checkout the code in https://github.com/mick703/magento22/tree/simple-helloworld-module
Done:)

1 thought on “It all starts with a simple module”